Background
View Client Alerts
Add Client Alerts
Update Client Alerts
Remove Client Alerts
Related Articles
Background
Client alerts in Profile EMR are shared with PARIS where any changes in Profile EMR will appear in PARIS and vice versa.
Note: There are other types of alerts which can be created in Profile EMR (and not seen in PARIS) but are administrative in nature. See Appointment Booking Pop-Up Notice.
View Client Alerts
Note: Due to system limitations, a client may only have 16 active alerts at a time.
Read-only client alerts can be viewed in various places within Profile EMR. The Patient Alert form where alerts are updated can be accessed two ways:
- From the Yellow Bar by clicking on the Alerts icon (triangle)

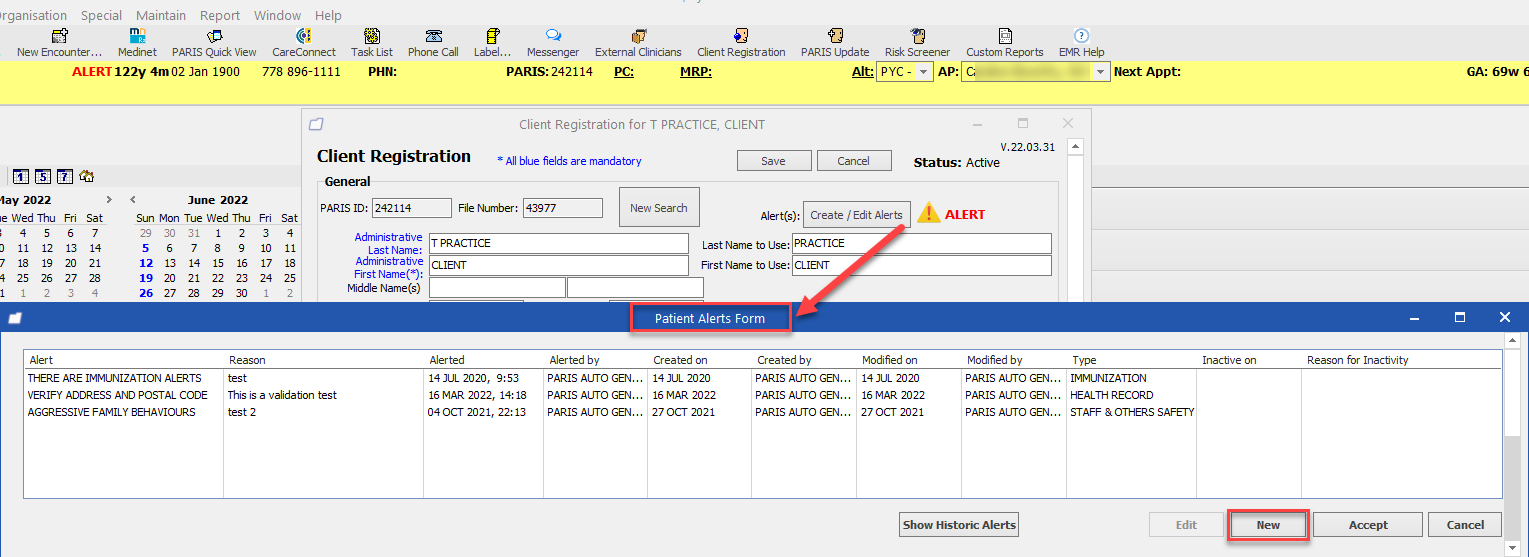
See Update the Yellow Bar for more information - From Client Registration form by clicking on the Create/Edit Alerts button

Add Client Alerts
1. Open the Patient Alerts Form from the Yellow Bar or the Client Registration form
2. Click New
3. Complete the following mandatory fields:
- Select the applicable alert from the Alerts dropdown menu
- Reason field is free text (accepts up to 50 characters including spaces)
- Alerted on field is a date picker and once a date is selected, defaults time to now
4. Click Accept Changes to update the alerts list with the new entry

5. Click Accept to close the Patient Alerts form

The Client Registration form remains open
6. Click Save on the Client Registration form so the alert is saved to both Profile EMR and PARIS
Note: It takes approximately 20 seconds to send the information to PARIS
7. Client Registration form automatically closes and Alter Client window opens
8. Click Alerts and you will see all Alerts information populated (PARIS, CSC pop-up alerts and Admin booking alerts)

Update Client Alerts
1. In the Patient Alerts form, select the alert you want to edit
2. Click Edit
3. Make edits to the Reason field
4. Click Accept Changes to update the alerts list

5. Click Accept to close the Patient Alerts form
Remove Client Alerts
1. In the Patient Alerts form, select the alert you want to edit
2. Click Edit
3. Enter a date on Inactivated on field
4. Click Accept Changes to update the alerts list

5. Click Accept to close the Patient Alerts form
Related Articles
Client Registration & Alerts Patient Form
Appointment Booking Pop-Up Notice
How to Update the Yellow Bar