Background
View Counsellor Waitlist
Add a client to Waitlist
Adding Information To the Reason Field
Make an appointment using quick appointment search
View client's appointment on Waitlist
Close a Waitlist entry
Delete wait list entry from Waitlist
Print Waitlist
Background
East Van Youth Clinic uses the EMR Wait List functionality to manage their counsellor waitlist. Wait List works as an electronic spreadsheet.
Vancouver Counsellors and East Van Youth Clinic Program Assistants will be entering client information into the EMR Wait List. Once a client is entered, the Vancouver Counsellors will manage the Wait List (i.e., following up with clients, booking appointments, closing clients off the waitlist).
View Counsellor Waitlist
Log into East Van Youth Clinic POS and from Work Center, click on Wait List:

Wait List opens. There are different filters available. The default filter will need to be changed from Intake Waitlist to Counsellor Waitlist:
1. Default Filter View: Intake Waitlist
2. Click the drop down
3. Choose Counsellor Waitlist

User can sort the waitlist by alphabetical name, date on the wait list, age, reason/notes or by days waiting.

Add a client to Waitlist
1. From Work Centre, click on Wait List
2. Click New Wait List Entry icon to add a client
3. New Wait List Entry window opens

4. Enter the following:
a. Wait List Type: type the word Counsellor and field will auto populate Counsellor Waitlist
b. Client: click the 3 ellipses to open Select Client window
i. Index: type client's last name, first name
ii. Click Search
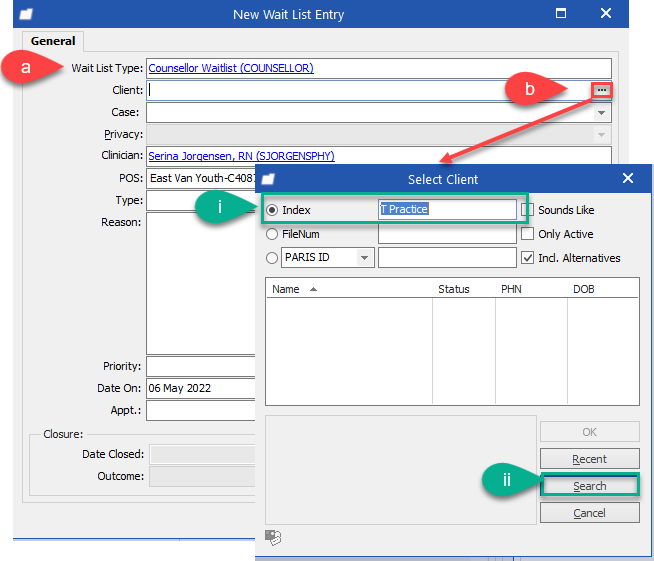
iii. Select the correct client (there could be more than one with a similar name) and then click OK

c. Clinician: defaults to signed in user
d. POS: defaults to EYC. Do not change
e. Type: type the word Counsel and field will auto populate Counselling (COUNSEL) appt type
f. Reason: standardized entry of information: the POS the client would like to be seen at and/or the counsellor they would like to see (optional)
g. Date On: defaults to today's date
h. Click OK

Client is now visible on the corresponding waitlist filter view: Counsellor Waitlist

Adding Information To the Reason Field
Note: Additional Information can be added the the Reason Field example: phone call made to client, message left etc
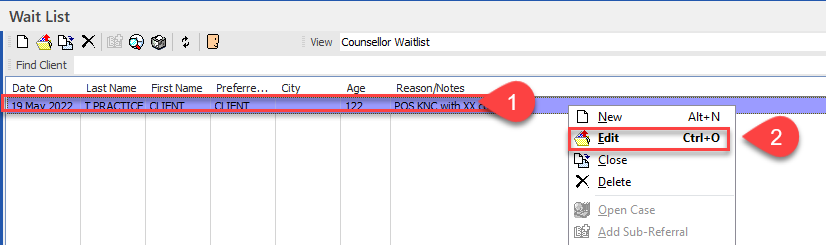
1. Right-click on client to open the options menu
2. Use drop down and choose Edit
3 Wait List Entry pop up will open
4. Free text additional information into Reason box
5. click OK
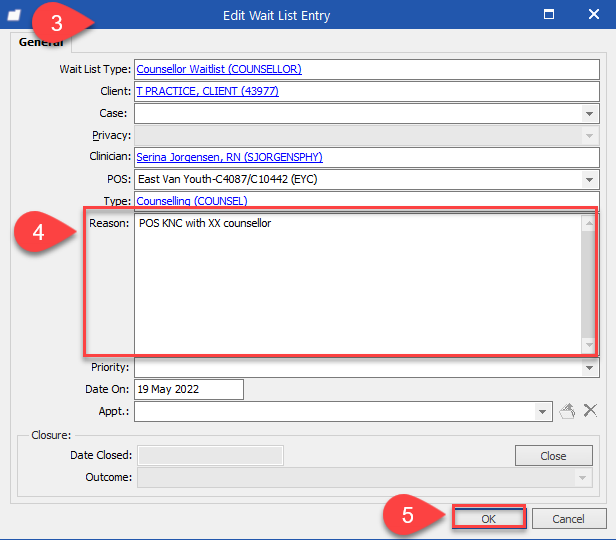
Additional information will be added the the Reason field

Make an appointment using quick appointment search
1. Click Appointment search icon
2. Date from: default is today's date
3. Date to: can use the drop down

4. POS: defaults to EYC. Do not change.
5. Prov: optional field
Option 1. Search by clinic appointments: Leave box blank
Option 2. Search by clinician appointments: Type name of clinician and will auto populate or select the 3 dots on the field box to search for clinicians

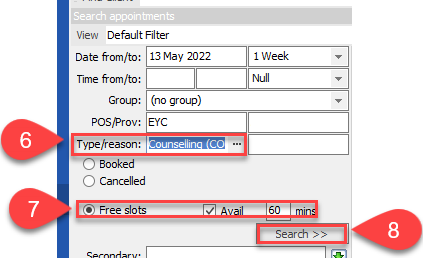
6. Type: type the word Counsel and field will auto populate Counselling (COUNSEL) appt type
7. Tick Free slots radio button and tick Avail checkbox and fill in 60 minutes
8. Click Search to find available appointments
Available appointment slots are displayed in yellow

9. Drag and drop the client from the Wait List to one of the yellow appointment slots
10. Click Yes to confirm

Client name is added to the appointment slot.

View client's appointment on Wait List
1. Double-click on the client wait list entry

2. View the client's future appointment
3. Click OK
4. Click X to close

Close a Wait List entry
When a client has had an appointment booked, the client should be moved from the Counsellor Waitlist to the Closed Counsellor Waitlist.
1. Select client on the Wait List, right-click over client's name
2. Use the drop down and choose Close

4. Select the reason for closing the appointment using the drop down menu
5. Click Yes

6. Click Refresh icon
7. Change filter from Counselling Wait List to Closed Counselling Waitlist to view client

Closed Counsellor Waitlist will look like this

Delete waitlist entry from Counsellor Wait List
If an entry was entered in error,
Option 1:
1. Right-click on client to open the options menu
2. Click Delete

3. Click Yes to confirm

Client is deleted from the Counsellor Wait List.
Option 2:
1. Click on client to highlight
2. Click X icon

3. Click Yes to confirm
Print Wait List
1. Click the Printer Icon
2. Follow Print Setup prompts
